


I'm finally getting around to prepping the Little Lonestar resin for painting. I've switched to a new primer, the Tamiya Fine Surface primer, after reading some recommendations for it on Model Horse Blab. Previously I'd been using the Rustoleum Painter's Touch, but it tended to leave a gritty, sandpaperish finish on the primed model, and the gray turned out to be TOO gray... hard to cover up with white paint.

So, I was pretty sure I wanted to use white primer this time, but there's one problem with that: if you're using white primer, how can you tell if a white resin is completely primed?
The solution seemed to be to double-prime: first with a gray coat, then with white.
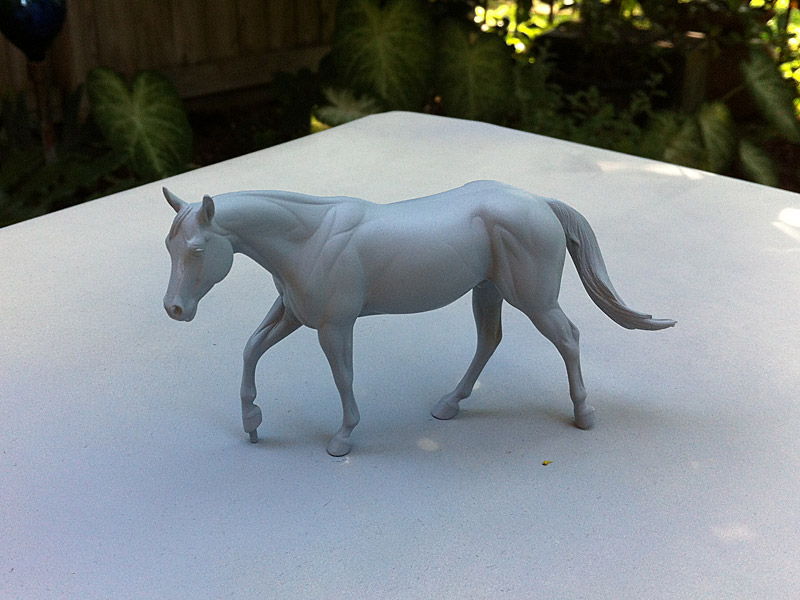
I primed with the gray yesterday. I was pleased to see that the gray is nowhere near as dark as the Rustoleum... in fact it's a very light gray, but still gave enough color to tell when the resin was completely primed. It also served to highlight a few pits and seam lines that I'd missed. I filled those in with modeling paste, sanded some of the seam issues with a fine-grit sandpaper, then let it dry overnight.
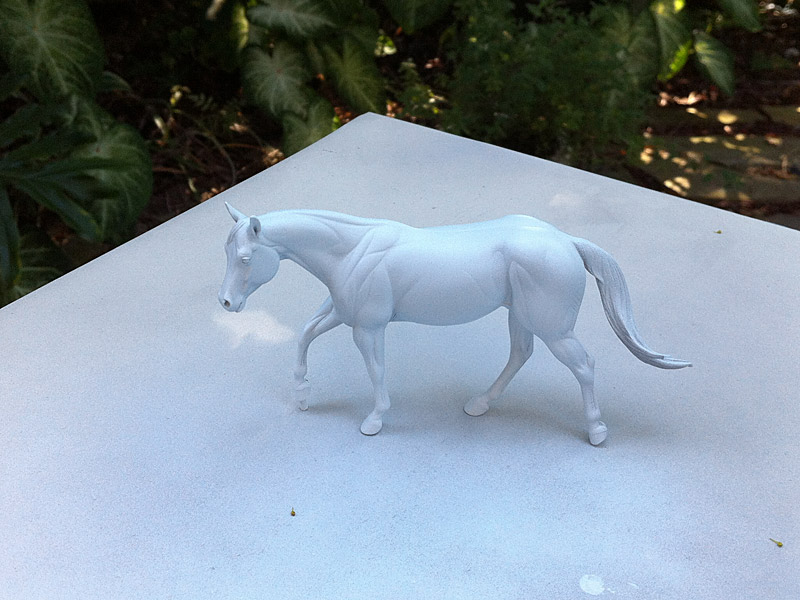
Today the white! He looks great, and the primer is amazingly smooth. I'm going to let him dry again overnight, then start painting tomorrow!
Primer tips:
- Always prime a resin before painting. If you don't, the resin may "weep" oils as it ages, and cause your paint job to flake off the horse.
- Always spray primer outdoors. Its toxic, noxious stuff. You don't want it in your house.
- I often use disposable gloves when painting, so I can spray primer while holding the horse. That way any overspray goes on the glove and not on my skin.
- Shake the can of primer for at least a minute or two before spraying. This ensures the primer is thoroughly mixed before it goes on the model.
- Don't spray in extreme heat, cold, or humidity. Any of these can cause problems with primer adhering to the model.